
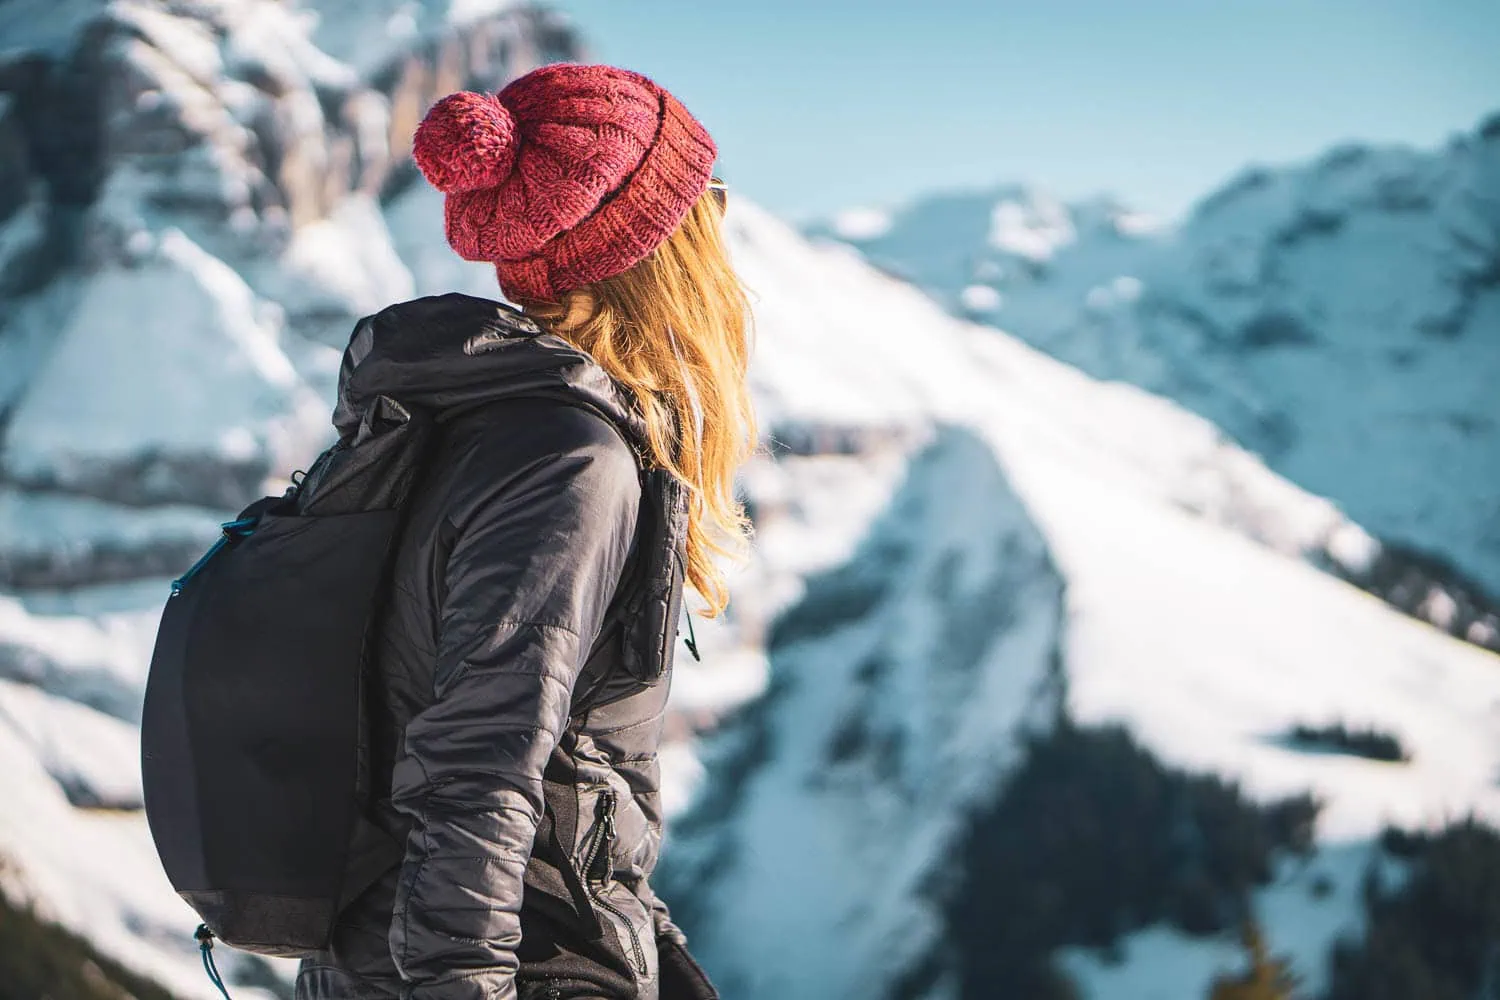
Winter walking is the winter activity with the lowest barrier to entry and the greatest share of underestimated details. You need neither new techniques nor a course for it, and mostly not even special equipment. More important is a sense of how your body loses heat in the cold, and the willingness to end the day earlier than it feels necessary.
This guide goes through, step by step, what comes along and what it weighs: the distinction from snowshoe and ski tours, the footwear question, the layering system, the complete packing list with weighed weights, and, at the end, the time rule that could make the winter tour fail.
Winter walking, snowshoe tour or ski tour
The three terms are constantly being mixed up, yet they describe ventures with completely different risk profiles. Winter hiking takes place on trails, which are cleared, tracked or mechanically groomed.[3] The ground is firm, the route is marked, and you are walking in normal winter boots.
In Switzerland, you can read that directly from the signpost: winter hiking trails are marked in pink and feature a hiker pictogram, Snowshoe routes are also pink, but feature a white snowshoe pictogram and are deliberately disobeyed.[4] In Germany and Austria, the signage is less uniform; the logic behind it is the same.
There is more to this distinction than mere signage. On a prepared winter walking trail, you are moving through terrain that someone before you controlled hat. As soon as you leave the track, you take on this task yourself, including the avalanche report, slope gradient and emergency equipment. The German Alpine Club draws a pragmatic line: small snow patches under about ten by ten metres and flat fields well below 30 degrees of inclination are negligible in terms of avalanches.[1] As soon as the slopes get longer and steeper, you need avalanche knowledge.
Winter hiking: why you get cold even though you've been sweating
The mistake almost always happens at the starting point. It’s minus four degrees, you put on everything you’ve brought with you, and after twelve minutes of climbing you’re soaked through with sweat. The moisture is trapped in your base layer, and as soon as you stop at the first viewpoint, it cools you down rapidly. Wear one layer less than feels right when you set off. You should actually feel a bit chilly for the first five minutes.
Then there’s the wind, which is by far the most underestimated factor in winter. Even with a wind speed of just ten kilometres per hour, a temperature of zero degrees feels like minus 3.3 degrees on the skin.[2] On a ridge or an open alpine meadow, you quickly reach areas where the air temperature on the thermometer tells you nothing about your actual situation. A 100-gram wind jacket or wind shirt is therefore, gram for gram, one of the most effective purchases for the winter.
The third point is obvious, yet it’s often overlooked: taking a break in winter involves taking active steps. As soon as you stop, you put on your insulated jacket, swap your sweat-soaked hat for a dry one, and sit down on something that keeps you off the snow. That way, you can sit in the sun for half an hour. If you unpack your snack first and only then think about changing, you’ll be freezing after five minutes.

Winter hiking boots: the most important piece of equipment
The good news first: for most winter walks you don't need special winter boots. Normal, waterproof walking boots with a sturdy, grippy treaded sole are enough, as long as the path is prepared. It all comes down to the sole and the upper; you couldn't care less about the label on the tongue.
More important than the type of shoe is the question of where the damp is coming from. Most wet feet in winter are caused by moisture from the inside: you sweat, the membrane can’t keep up with wicking it away, the thick woollen sock soaks up the moisture and loses its insulating properties just when you stop moving. A thinner sock that stays dry keeps you warmer than a thick one that’s damp.
I experimented with mid-calf boots and gaiters for a while. Whenever there was more than twenty centimetres of snow, my feet got wet every single time. Since then, my rule has been: if there’s more than about ten centimetres of snow, I put on my high boots. And the reason why this is more than just a matter of comfort is explained by the DAV: frostbite on the feet can occur in wet shoes even at plus six degrees, without any frost at all.[2]

Crampons, spikes and when they belong on your boots
The difference between an enjoyable and an unpleasant winter walk often comes down to three hundred and fifty grams in your rucksack. Groomed paths are trodden down by a thousand footsteps, thaw at midday and freeze over again at night. The next morning, it’s a slippery slope – especially on the flat sections where you least expect it.
Crampons, meaning chain or spike attachments made of rubber and steel, can be pulled over your shoe and taken off again in thirty seconds. They weigh around 350 grams per pair and are the right tool for icy paths, hard old snowfields and frozen forest sections. You don't need crampons for that, they belong in steep alpine terrain and on a correspondingly stiff boot. And snowshoes won't help you at all on ice, they are built for deep, loose snow.


Gaiters
Short gaiters weighing around 120 grams keep snow out of the top of your boots when you are walking off-piste or trudging through piled-up snowdrifts. On paths that are cleared all the way, you can leave them at home. As soon as the route is untracked even in places, for 120 grams they keep your feet dry in a way that no other piece of equipment does.
Winter hiking clothing: the layered system by weight
This here is my system for a winter hike between about zero and minus ten degrees. All weights are weighed on my own equipment, no catalogue values.
| shift | Weight | Role and experience |
|---|---|---|
| Merino T-shirt | 142 g | Base layer directly against the skin, stays on all day. |
| Merino long-sleeved top | 230 g | Second layer. When climbing, that plus wind protection is almost always enough. |
| Windshirt | 100 g | Wind costs more warmth than cold. These 100 grams catch it, come out as soon as there is a draught. |
| Fleece midlayer | 297 g | The layer you put on and take off most often on the move. |
| hard-shell jacket | 240 g | Only in snowfall and strong wind. When it's sunny, it stays in the rucksack and still has to come along. |
| down jacket | 359 g | Pure belay jacket, sits right at the top of the rucksack. Gives the best warmth-to-weight ratio, loses this when wet. |
| Merino long johns | 203 g | The legs cool down faster when standing than the upper body. |
| Thin gloves | 42 g | Bottom layer of the glove system, suitable down to about zero degrees. |
| Mittens | 53 g | Warmer than gloves, because of less surface area. They go over the top. |
| Merino Buff | 39 g | Doubled up as a beanie for climbing. Gets soaked with sweat, hence the change. |
| Beanie | 61 g | The dry reserve for the break, separately packed. |
| walking trousers, water-resistant | 400 g | Softshell is enough. A wet pair of cotton trousers gets brutally cold when you're standing still. |

Two details are worth more than any expensive jacket. First, the glove onion method: thin gloves down to about zero degrees, with mittens over the top when it gets colder. Two thin layers beat one thick glove because you have finer control and because you only need to take off the outer layer for zips and reading maps. Second, changing your hat. On the ascent, the buff absorbs the sweat; during the break, you put on a dry hat. A wet hat during a break is the surest way to freeze that I know.
What is deliberately missing from the list: a second insulated jacket. On prepared paths you are not breaking trail, so you produce less moisture from the inside, and the down jacket stays dry enough to do its job. As soon as you go into deep snow, this calculation changes, and then a synthetic jacket belongs in the mix.
The packing list for the winter hike
The list applies to a day tour on prepared or tracked paths, in low mountain ranges or moderate alpine terrain. Weighed or, where marked with a tilde, realistically estimated.
| Item | Weight | Comment |
|---|---|---|
| Walking boots, high and waterproof | 1,800 g | By far the heaviest single item. With around 10 cm of snow or more, there is no alternative. |
| walking trousers, water-resistant | 400 g | A softshell is enough as long as continuous snowfall isn't forecast. |
| long merino underpants | 203 g | The legs cool down faster when standing than the upper body. |
| Merino long-sleeved top | 230 g | Second coat, stays on all day. |
| Merino T-shirt | 142 g | Basic rule. Cotton has no place on the body in winter. |
| Merino walking socks | 63 g | Rather thin and dry than thick and damp. |
| Functional underwear | 50 g | |
| Thin gloves | 42 g | Bottom layer of the glove onion. |
| Merino Buff | 39 g | Doubled over as a climbing beanie. |
| Item | Weight | Comment |
|---|---|---|
| down jacket | 359 g | Only comes out during the break, which is why it's right at the top of the rucksack. |
| Fleece midlayer | 297 g | The most active layer of the day. |
| hard-shell jacket | 240 g | Stays inside all day when it's sunny and still has to come along. |
| Windshirt | 100 g | Gets used significantly more often than the hardshell. |
| Beanie | 61 g | The dry reserve for the break, packed separately from the buff. |
| Mittens | 53 g | Second layer over the thin gloves. |
| Item | Weight | Comment |
|---|---|---|
| WeitLäufer Minimalist, 30 L | 340 g | My frameless companion for day trips. In winter, that's more of a lower limit than an athletic challenge. |
| crampons | ~350 g | The 350 grams that decide the character of the day once it has frozen. |
| Walking poles with winter baskets | 350 g | Without large baskets, the poles sink right down to the grips. Summer baskets are no good. |
| Handy | 146 g | The battery lasts significantly less in the cold, so keep it close to your body to keep it warm. |
| Short gaiters | ~120g | Only necessary once the route is unploughed in places. |
| bivvy bag | 108 g | The cheapest emergency protection there is. |
| First-aid kit | ~95 g | Including blister plasters, stiff winter shoes rub in unfamiliar places. |
| Map and compass | Approximately 80g | Trail markers are regularly covered in snow in winter. |
| Headlamp | 79 g | Belongs on every ride, even the two-hour loop. |
| Sunglasses | 41 g | Snow reflects the light strongly, snow blindness is real. |
| Cushion | 35 g | Separate yourself from the snow during the break. Ridiculously light, enormously effective. |
| Documents | 25 g | ID card, debit card, cash, Alpine Club membership card. |
Vacuum flask or kettle
Hot liquids are part of the body's heat balance in winter. Anyone who drinks and eats too little gets cold quicker because the body simply lacks the material to produce its own heat. And almost everyone drinks too little in winter because cold water holds no appeal when it is cold.
There are two ways. A 0.75-litre vacuum flask weighs around 350 grams and is remarkably simple. My setup weighs almost the same, but has the added bonus of being able to be refilled: a spirit stove, titanium mug, fuel and a piece of fresh ginger, which I slice on the go. After two hours in the snow, a freshly brewed cup of ginger tea is quite different from the remains of lukewarm tea from a flask.
| Item | Weight | Comment |
|---|---|---|
| Fuel and bottle | 115 g | Sufficient for several infusions a day. |
| Titanium mug 600 ml with lid and windshield | 100 g | Without a windshield you wait in winter instead of cooking. |
| pocket knife | 30 g | For the ginger, and for everything else as well. |
| Teabags and fresh ginger | ~20 g | Spicy food stimulates circulation and metabolism. Chilli in your provisions has a similar effect. |
| spirit burner | 20 g | No valve, no thread, nothing to jam in the cold. |
| Lighter and matches | 12 g | Lighters are difficult to ignite in the cold. Matches are the backup. |

What the winter hike really weighs
| Category | Weight |
|---|---|
| Clothing on the body | 2.969 g |
| Consumables (1.5 L of water plus provisions) | ~2,200 g |
| Equipment in the rucksack | ~1.769 g |
| Clothes in the rucksack | 1.110 g |
| Kitchen | 297 g |
| TOTAL | ~8.345 g |
A good eight kilos sounds like a lot for a day tour, and in summer it would be. The breakdown is interesting: around 5,400 grams of that goes into the backpack, including poles and microspikes, even if both are not inside it at times. The rest is on your feet and body, where you can barely influence it. For comparison: the same tour with snowshoes and avalanche safety equipment comes out to a good eleven kilos. The difference is a good two and a half kilos, and it comes solely from the choice of terrain.
If you want to save weight in winter, you also have precisely one lever, and that is the contents of your backpack. You can't bypass the 1,800-gram hiking boots, nor the insulation layer; the rest is up for negotiation.
Tour planning: half the schedule, double the buffer
When planning, winter differs more from summer than it does in terms of equipment. In December 2016, I was with a friend at the Brunnihütte near Engelberg, 800 vertical metres of ascent from the Bannalp, the hut at 1,860 metres, around minus three degrees. The sunset that we photographed has a timestamp: 15:49. We were the only overnight guests, had a six-bed dorm to ourselves, and there was rösti with cheese and a fried egg. But the number that has stuck in my mind is 15:49.
The DAV recommends a time buffer of one to two hours before darkness falls and advises choosing lower objectives with south- to southwest-facing slopes.[1] That sounds conservative until you've climbed down on an icy forest track at dusk.
Assume half the summer output.
Snow takes effort, even on groomed paths, and breaks take longer because you change clothes every time. Measure in hours instead of kilometres.
Set the turnaround time before you set off.
Before setting off, decide on your absolute turnaround time, no matter how far you've got by then. Anyone who only does the sums at the summit is doing them too late. One to two hours of leeway before dark is the minimum.
Take a tour that you know from the summer.
In winter, markings are covered in snow and junctions look different to how they do in summer. Familiar terrain cuts the navigation problem in half.
Check if the hut is open.
Winter closure is the norm for mountain huts, and many only open at the weekend. Finding a closed door after a three-hour climb is more than a disappointment in winter.
Take the head torch on the short run too.
79 grams against the prospect of standing on ice in the dark. From about 4 pm it gets dim, and daylight disappears faster than it announces itself.
Keep the electronics warm.
Mobile phone and camera batteries lose a massive amount of capacity in the cold. Carried against the body they last the day, in the top pocket they are dead by midday. A spare battery weighs almost nothing.
Regarding hiking in November, which is asked about more often than you might think: November is the most ambiguous month of winter. Snow is often only patchy, many huts are already closed for the winter season, the paths are muddy instead of frozen, and it gets dark just as early as in December. It is still a good time if you choose low-lying terrain and leave your expectations of snow at home.
Recognising hypothermia before it becomes dangerous
Hypothermia is defined as a core body temperature below 35 degrees. The DAV divides it into three stages: mild between 35 and 32 degrees, recognisable by restlessness, shivering and pale skin. Moderate between 32 and 28 degrees, and this is where the dangerous sign lies, because the shivering stops and consciousness becomes clouded. Below 28 degrees it becomes critical.[2]
The practical consequence for a normal winter hike is simple: if someone in the group stops shivering, even though it is cold, or starts acting strangely calm and a bit spaced out, that is an alarm signal. Then it is time to turn back, immediately and into warm clothing.
Everything you can do about it is already on the packing list: a dry spare layer, bivvy bag, warm tea, food. At 108 grams, the bivvy bag is the item that almost everyone leaves out and that almost no one regrets once they've had to use it.
Where you can hike in winter
For a winter hike you don't need to travel to the Alps. Almost every tourist region with reliable snow marks out winter walking trails and grooms them, and the low mountain ranges are often the better choice for this than the high mountains: the slopes are moderate, the journeys there are short, and the forest provides structure when visibility becomes poor.
I'm Black Forest in good winters there is enough snow for weeks in the high altitudes around Feldberg and Belchen. We have been testing here for years, in summer and in winter, and the development department is an hour's drive away in Emmendingen. Who from Freiburg aus starts, get to the Schauinsland by bus and train and on to the Feldberg, without a car and without hunting for a parking space in the snow. In winter that's worth more than in summer, because you can hike a trail like that instead of a loop and don't have to return to the starting point when it gets dark early.
The actual reason to go hiking in winter, however, is a meteorological one. At the beginning of December, I did a short loop from Wirzweli to the Gummenalp, 8.5 kilometres, under 400 metres of ascent, three and a half hours. In the valley it was minus six degrees and thick fog. At 1,220 metres it was plus one degree, cloudless skies and a sea of fog below us. Winter temperature inversions are the reason why just three hundred metres of ascent can be worthwhile, and in summer there is no equivalent for this.

A word about the animals. For deer, chamois and above all capercaillie, winter is the hardest time of the year, and every flight costs reserves that cannot be replaced. Stay on the paths, avoid forest edges and thickets at dusk, and respect wildlife protection areas. This happens almost automatically anyway on prepared winter walking trails, which incidentally is another argument in their favour.
Frequently asked questions about winter hiking
Several thin layers instead of one thick one: merino base layer, long-sleeve shirt, windshirt, plus fleece and insulated jacket in the backpack. When setting off, consciously wear one layer fewer than feels right, and take a dry spare hat for the break.
On prepared paths, normal waterproof hiking boots with a sturdy treaded sole are sufficient. From about ten centimetres of snow, a high upper is a clear advantage, along with gaiters. More important than the boot is that the sock stays dry: a thinner dry sock keeps you warmer than a thick, damp one.
Crampons for ice and hard-frozen ground, around 350 grams a pair and slipped on in thirty seconds. You only need snowshoes from about 20 to 30 centimetres of loose snow away from the paths, everything about that is in the Snowshoe guide.
Assume about half your summer performance and plan by time instead of distance. The German Alpine Club recommends a buffer of one to two hours before nightfall. Set your turnaround time before you even set off.
Yes, but November is the most uncertain month: snow often lies only in patches, many huts are already closed for the winter season, and it gets dark just as early as in December. Choose lower terrain and plan without expecting fixed snow cover.
Almost every tourism region with reliable snow signs and grooms winter hiking trails. The low mountain ranges are often better suited for this than the high mountains because the slopes are moderate and the forest provides structure in poor visibility.
25 to 30 litres is enough, but it is tighter than it sounds. More important than the volume is a material that does not absorb wet snow and fastenings that can be operated with gloves. More on this in the Guide to Ultralight Rucksacks.
Sources
- German Alpine Club, „Safe Winter Walking“: route selection, a time buffer of one to two hours before nightfall, and the classification of small snow patches and gentle slopes under 30 degrees. alpenverein.de
- German Alpine Club, „Hypothermia and Frostbite in the Mountains“: Stages of hypothermia from a core temperature below 35 degrees, the wind chill effect and the risk of frostbite in wet boots. alpenverein.de
- German Alpine Club, winter hiking themed page: trail types, equipment recommendations and the short hours of daylight in winter. alpenverein.de
- Swiss hiking trails, winter signage: winter walking trails pink with hiking pictogram and prepared, snowshoe routes pink with white snowshoe pictogram and untracked. schweizer-wanderwege.ch